 Lauper Labs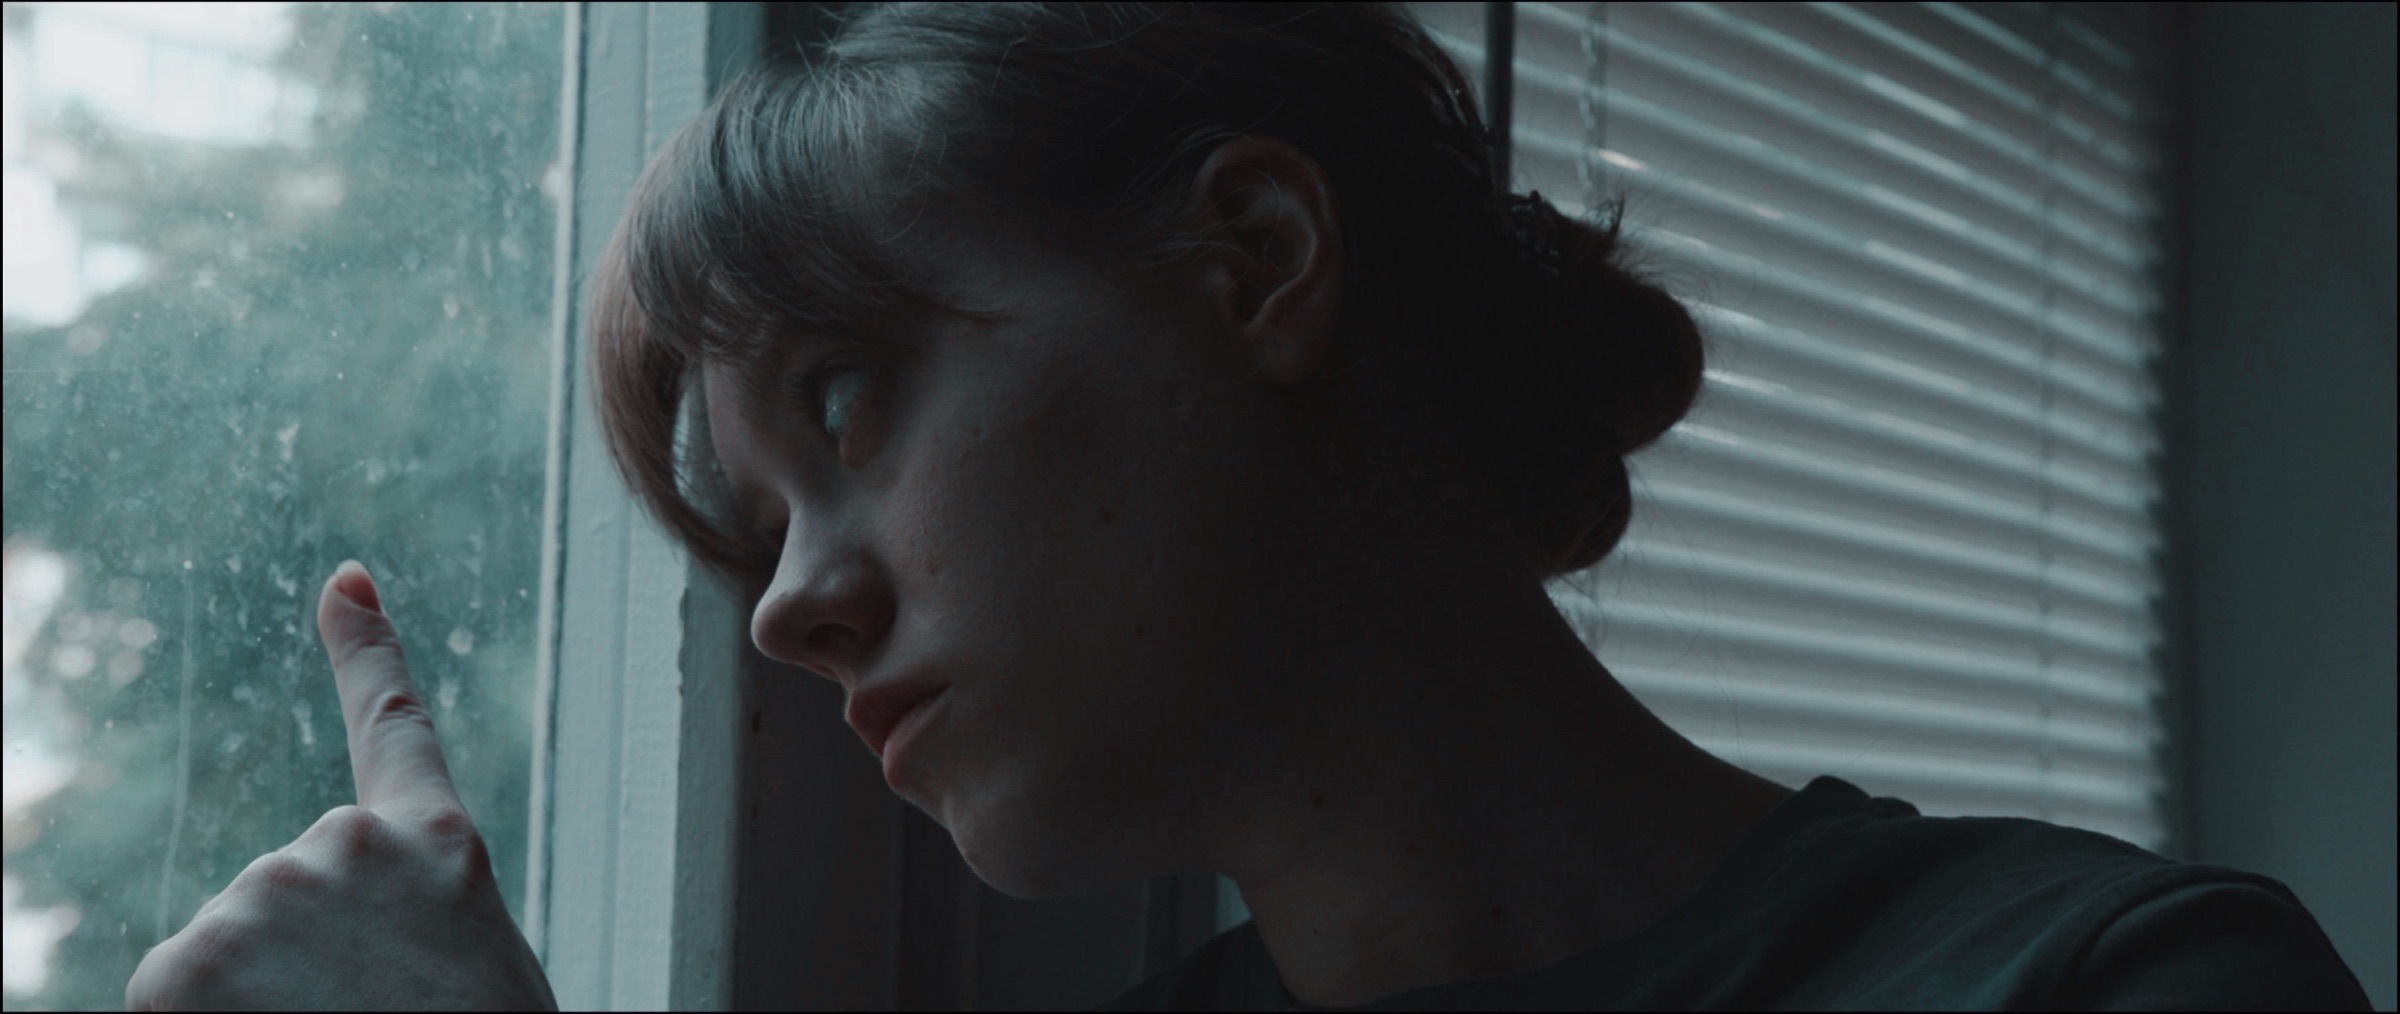
PeekLUT
Color grading for iPhone and iPad

To create a Technicolor look on iPhone, start with a balanced image, establish strong but controlled contrast, then reshape the relationship between the red, green, and blue channels. In PeekLUT, the Technicolor 3-Strip tool does this through per-channel cross-mixing rather than a single preset pasted over the image.
That distinction matters. The recognizable character of a three-strip-inspired grade does not come from saturation alone. It comes from how colors separate, overlap, and contrast with one another.
What is a Technicolor look?
Classic three-strip Technicolor was a photochemical capture and dye-transfer process. A modern iPhone app cannot reproduce that physical pipeline inside a digital image, but it can build a look inspired by its visual character: assertive color separation, rich contrast, and a deliberate relationship between the primary channels.
PeekLUT describes its Technicolor 3-Strip control as a recreation of the saturated, high-contrast dye-transfer look through per-channel cross-mixing. It is a creative digital treatment—not a claim of exact photochemical reproduction.
Why increasing saturation is not enough
A global saturation slider makes every color more intense at once. That often produces the wrong result:
- Skin becomes orange or red before the rest of the palette feels finished.
- Bright colors clip and lose texture.
- Neutrals become contaminated.
- Different hues feel equally loud instead of deliberately separated.
Channel cross-mixing changes the color relationships themselves. It lets red influence green and blue, green influence red and blue, and blue influence red and green. The result can feel more integrated and cinematic than simply turning saturation upward.
The three Technicolor controls in PeekLUT
PeekLUT exposes one control for each primary channel.
Red
The red control determines how much red bleeds into the green and blue channels. Use it to change the way warm subjects, skin, lips, fabric, and practical lights relate to the cooler parts of the frame.
Small adjustments are usually enough. If skin begins to dominate the image or neutral highlights feel pink, pull the control back and recheck the grade.
Green
The green control determines how much green bleeds into red and blue. It is especially noticeable in foliage, mixed daylight, cyan-green shadows, and scenes with a large natural palette.
Green can alter perceived brightness quickly, so compare both color and luminance while adjusting it.
Blue
The blue control determines how much blue bleeds into red and green. It can reshape skies, window light, cool shadows, and the separation between a warm subject and a cool environment.
Watch dark hair and deep shadows closely. A strong blue cross-mix can create an appealing cool density, but too much may make shadow detail feel blocked or unnaturally cyan.
A practical Technicolor-inspired workflow on iPhone
The order of operations makes the process easier to control.
1. Start with the correct color space
If the footage was recorded in a log format such as Apple Log, Sony S-Log3, Fuji F-Log, ARRI LogC, or RED Log3G10, convert it before judging creative color. PeekLUT includes input, timeline, and output color-space controls for this purpose.
For normal iPhone photos and standard video, a Rec.709 or sRGB workflow is usually the appropriate starting point.
2. Balance exposure and white balance
Correct temperature and tint before building the look. Then set exposure, blacks, whites, highlights, and shadows. The image does not need to be perfectly neutral, but obvious capture problems should not be hidden underneath the effect.
3. Shape contrast before cross-mixing
A three-strip-inspired look benefits from clear tonal separation, but crushed shadows and clipped highlights leave the color controls with less information to work with.
PeekLUT's film contrast, shadow toe, and highlight shoulder controls provide more specific shaping than a single contrast slider. Build a firm midpoint, keep important shadow detail, and create enough highlight roll-off for bright areas to remain photographic.
4. Establish the base palette
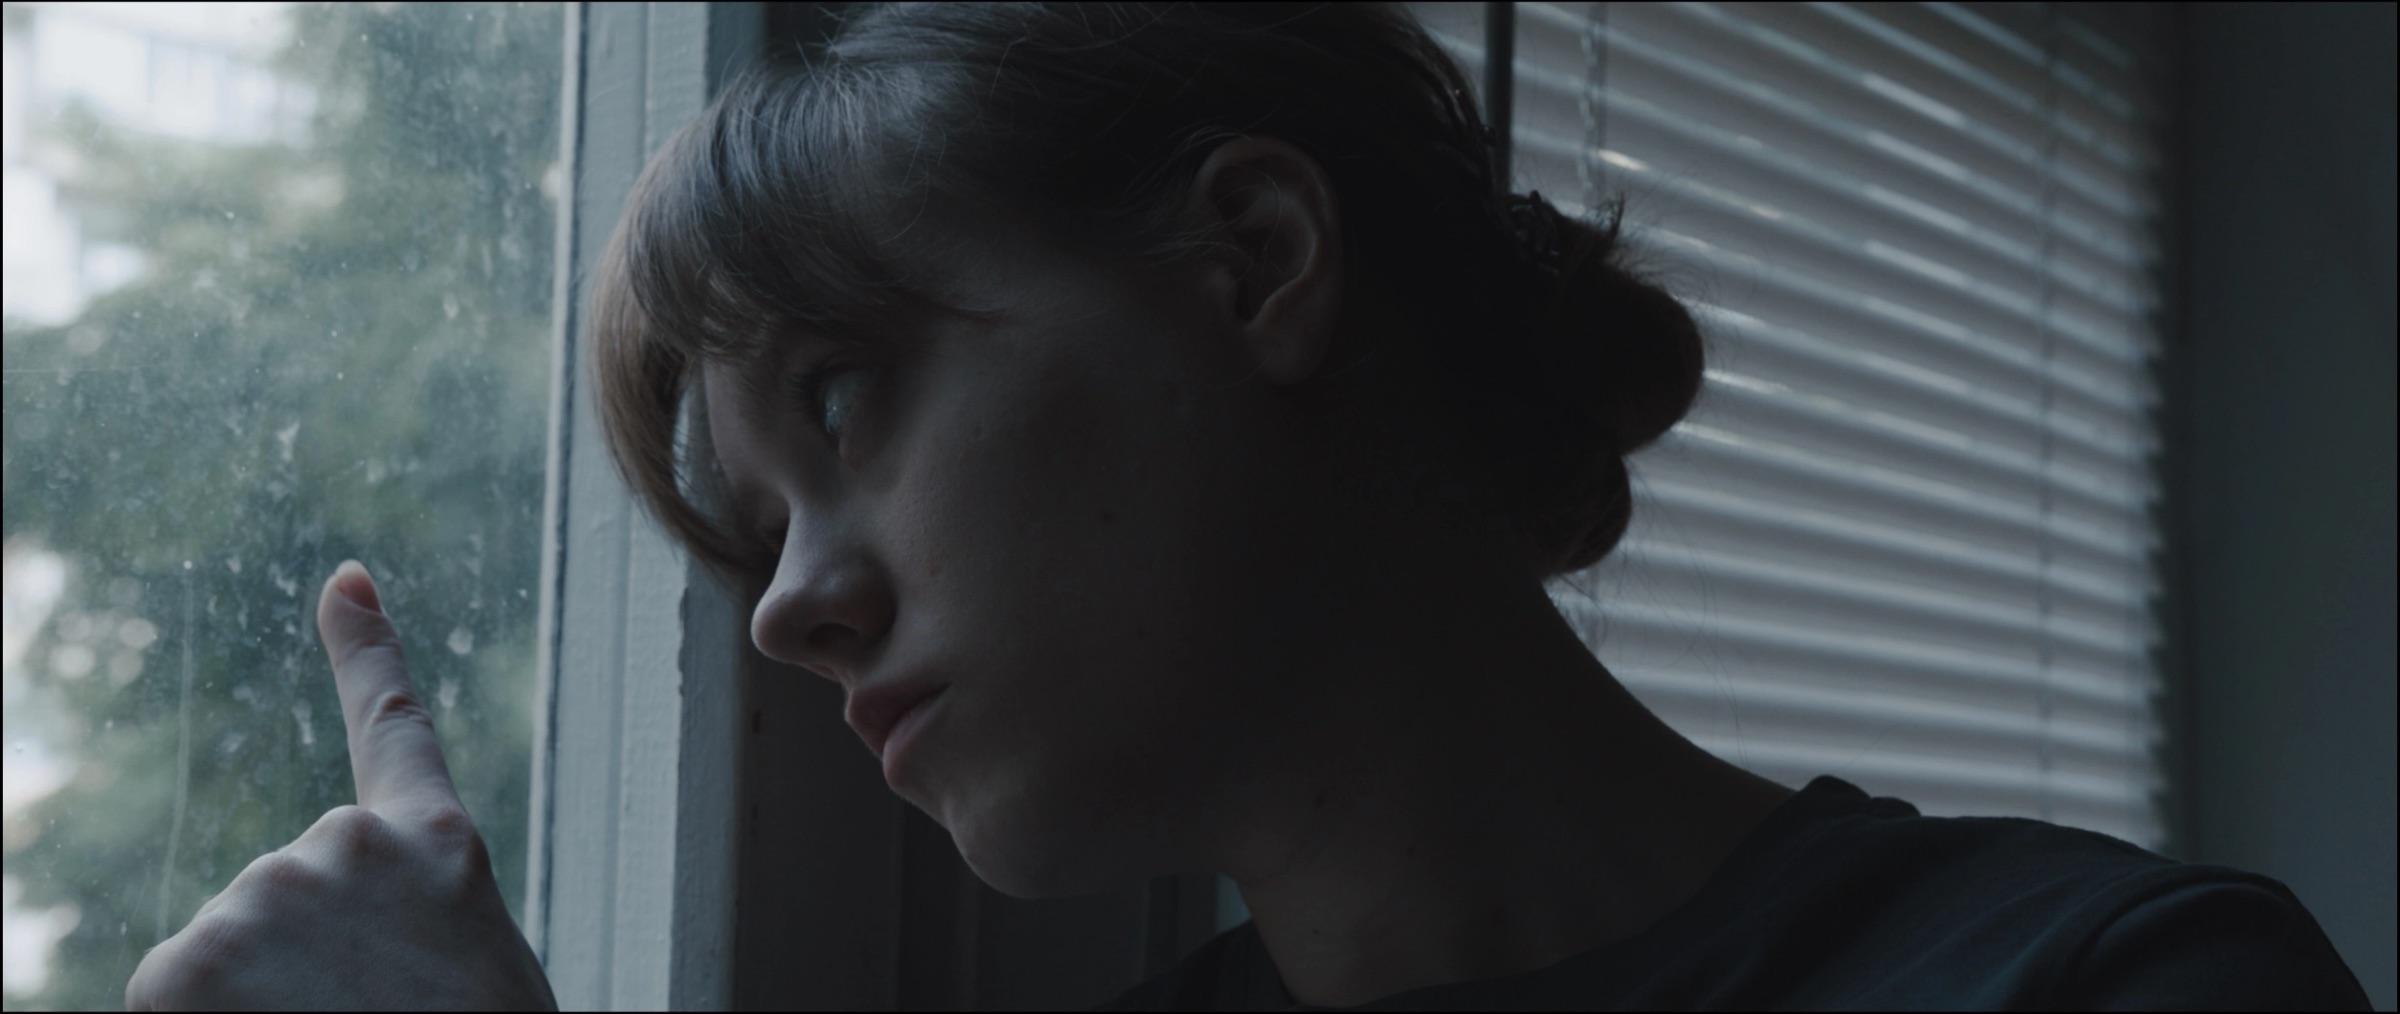
The comparison above begins with the original image. Drag the divider to see how the Technicolor step changes the relationship between colors while preserving the composition and underlying tonal structure.
You can begin from a neutral correction, a LUT, a split-tone preset, or a manual grade. The important part is to know what the base is doing before adding cross-mixing.
5. Adjust one primary channel at a time
Begin near the neutral position and move one control slowly. Check skin, neutrals, foliage, and the brightest saturated object in the frame. Return the control toward neutral before testing the next one so you can learn what each channel contributes.
Once each control makes sense on its own, combine them in smaller amounts. The interaction between channels creates the look.
6. Refine saturation by tonal range
If the palette needs more intensity, film saturation is often safer than a hard global boost because it uses soft log compression to reduce clipping in highlights and shadows. PeekLUT also provides hue-, luminance-, and saturation-targeted curves when one part of the palette needs correction without changing everything else.
7. Finish with texture, not more color
When the palette is working, use grain, halation, bloom, or optical diffusion sparingly. These tools change how the image feels without requiring another large color move.
For an additional final-stage tonal treatment, see the guide to film print emulation on iPhone.
How to keep skin tones under control
Skin is often the first place an aggressive channel mix becomes distracting. Use these checks:
- Compare the face at full size, not only the whole frame.
- Look at lips, cheeks, ears, and the transition into shadow separately.
- Reduce the red control if warm features begin merging into one color.
- Use a radial or linear mask when the environment needs a stronger effect than the subject.
- Compare before and after repeatedly instead of trusting your memory of the original.
The goal is not necessarily neutral skin. The goal is intentional skin that still has believable variation.
Using the look on video
A still frame can hide problems that become obvious in motion. Play the complete clip after setting the cross-mix and watch for changing light, moving faces, and saturated objects entering the frame.
If a shot moves between daylight and shade, a slightly restrained mix will usually hold together better than the most dramatic setting. Save the finished controls as a preset only after checking multiple moments in the clip.
Common Technicolor-look mistakes
Treating the effect as a one-tap filter
The same channel mix will not suit every source. Balance and exposure still need to be set for the image in front of you.
Combining extreme contrast with extreme color
Hard contrast can remove the subtle color variation that makes channel mixing interesting. If the result looks posterized, soften the contrast before lowering saturation.
Ignoring neutrals
White walls, grey clothing, clouds, and specular highlights reveal unwanted color contamination quickly. Use them as reference points even when the intended grade is stylized.
Adding every film effect at once
Grain, halation, diffusion, print simulation, split toning, and cross-mixing can work together, but each should have a clear job. Build the look in stages and bypass each stage to confirm it is helping.
Is a Technicolor look the same as a LUT?
No. A LUT is a stored color transform. PeekLUT's Technicolor controls are adjustable channel-mixing operations inside the grade. You can use them with a LUT, save them in a PeekLUT preset, or include supported adjustments when exporting a finished look as a .cube LUT.
For a broader overview of LUTs, masks, film tools, and mobile export, read our iPhone color grading guide.
Frequently asked questions
Can I create a Technicolor effect on an iPhone?
Yes. PeekLUT includes a Technicolor 3-Strip tool with independent red, green, and blue cross-mixing controls for photos and video.
Is this an exact reproduction of the original three-strip process?
No. The original process was photochemical. PeekLUT creates a digital look inspired by its saturated, high-contrast color character through channel cross-mixing.
Should Technicolor come before or after a LUT?
There is no universal answer. Start with the transform that establishes your base palette, then add cross-mixing and compare the result. Avoid stacking two strong transforms without reducing their intensity.
Can the Technicolor look be saved?
Yes. You can save the grade as a PeekLUT preset for reuse. Supported adjustments can also contribute to a .cube LUT exported for compatible desktop editors.
PeekLUT
Color grading for iPhone and iPad